Friday, December 13, 2013

The Freebie Jubilee//A Sumptuously Royal Freebie Collection!

     Were you waiting for another freebie collection? Buckle up!
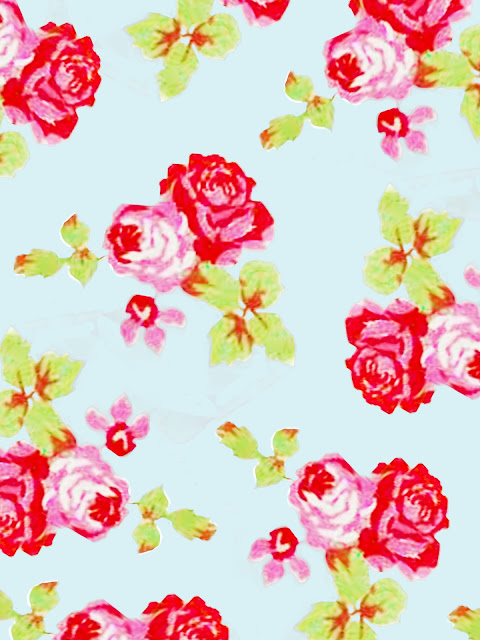
This time, I knew I need to step up on the rich tones of maroons and gold inspired by my last DIY post...the one where I made the vintage themed boxes, remember? Till now, I'm crushing at how utterly charming they look in my crafty area (oh darn my girly tastes!), So here it is, full of florals (again!), a generous doze of gold glitter,gingham in gold, powdery baby blues and undertones of beautiful velvet and damask!
You can download these to use as digital page backgrounds or you can print 'em out to use as pretty invites, super-gorg giftwrap papers, a tiny gallery frame to hang or even mini notebooks to give as special favors!
Keeping in mind all you lovely ladies, I'm uploading the jpeg images as well so that you can just right click and save, or you can download the entire package at once which comes as zip file!


Are you swooning over the pretty lil hearts or the monarch butterflies? I am! If you have any requests for a collection theme, drop me a comment or do let me know which is your fav in this :)
..................................
And if this does make you happypants, please pin it and share it with all those crafters out there!


You can also drop by at my Pinterest and Facebook Page and follow me or become a
subscriber here at Craft A Doodle Doo! It'll be a pleasure to have you!
................................
You can download the full Charm Bash Collection here!

If you missed the post which was my inspiration for this collection, click here!

Dive into my wonderful gallery of other freebie collections here!
Lots of love, Nash


Friday, December 6, 2013

Inspiration Nation//DIY Vintage Storage!

Checklist for things I love:
-Maroons and reds
-Florals
These storage boxes  

My love for everything vintage themed needs no introduction..what can I say...it just, happens :) Anyhow, we had loads of very sturdy boxes lying around in which 'thobes' come in. (know thobes? It's the traditional white garment guys over here put on. But that's not what we concern ourselves with,is it?it's what they come in!).
The best thing about these is that they are super dent-proof, wear for ages and perfect to chuck in craft supplies, no wait....anything!
Here's how I made mine!

Like this? Pin it!

I made a set of three beautifully coordinated boxes. At my local craft store we get rolls of adhesive paper (each for about 2$ approx.). The deep red box has been covered with a velvet textured red adhesive paper. It feels just like velvet but it's actually paper not fabric with an adhesive backing! How cool is that? ...and if you've been dawdling on my humble blog previously, you would have seen how many, many, many times I use these kind of rolls,
              The third box is a glossy adhesive roll with a delicate floral print (for 2$ too) and the first is a thrifted floral pillow cover. (or should I say it took only about half of the pillow cover? :D). The pillowcase set of 2 cost me 2$ which would make this for 0.5$! You just need to scout 'em shelves ladies!
(Click read more to see the full post!) 

Friday, November 29, 2013

Inspiration Nation// Statement Gallery Wall DIY!

I'm sorry new posts on this blog have grown scarce since the past couple of weeks but my final exams are in full swing and I've pretty much been a zombie! If you want to have a look at the projects I've been up to, you can check out my Facebook page! Anyhooooo, I slipped this DIY into my last weekend because it was so simple and easy and perfectly fit in the lil time I could afford for something other than my studies! A DIY statement gallery wall! You can make a ceiling to floor version or a half version. I've got the pictures ready to expand my gallery when my schedule gives me more space to breathe! :)
Are your empty walls in need of a chic vibe?
*_*
The pattern was hand-drawn by me and you can download it at the end of the post. All you need to do is color in to coordinate your room decor! (Oh of course, you color in just once and then just do multiple print outs =D)
If you want yours exactly like mine (because let's see, bright and cheerful rooms attract magnetize you), then just follow the steps below!

WARNING LETHAL : I'm a very messy artist. Please don't be eeked out be my colors going outta the lines!
Here is what your sheet of paper should look like after you've printed it out. I printed mine out on an A4 sized paper
Start by taking a salmon pinkish color pencil and filling in the big buds. Take a medium pink and shade over lines for a little more interest....
Go to the whole flowers and use the medium pink again to start at the base of the petals coloring almost all the way to the end of the petals. Then round off the end with a pretty red color merging into the pink shade..Fill in the center with a mango yellow and shade it with a bit of a mustard color pencil.
Next fill in the curvy round flowers with each of the two orange and yellow. Fill in the centers black as shown!
Fill in the stems with a forest green shade.
Color in half of the total leaves on the entire paper with the forest green. Fill in a sweet minty green in the middle stem of these leaves. Then for the other remaining leaves, do the opposite (i.e fill the leaves with the minty green and do the middle stem a forest green)
Fill in the round berry-like stems with light and dark browns shades. I used dark brown for the fringe-like pattern on the berries.
And you're done!
Scan your colored paper and do multiple copies according to how many rows you want to go across your wall!

You can either frame them (and that'll obviously take longer), or use washi tape as a border to mimic frames, or use washi tape to just tape the top of the pictures to hang 'em!
Next time, I'll do neon washi tape frames. ^-^

....
Here is the finished result!
This table needs a bit more decoration, I think. It's one of the drafting tables I use for my architecture drawings (read :"one of")
Side-view!
I need to finish up the two more rows underneath :)
Here's one to pin!
Here's the pattern to download! >> Free Floral Printable Pattern
..........
If you loved this, then consider becoming a subscriber or hop over at my Pinterest and Facebook page to follow on the fun regularly!
..........
PS: Check out more cool, easy and inexpensive DIYs here in my DIY Gallery!

Love ya' all
xoxox, Nash


FRESH IRRESISTABLE IDEAS...

RIGHT TO YOUR INBOX!

* indicates required

View previous campaigns.