Monday, May 12, 2014

CRAVINGS RAVINGS // MANGO FLOAT CHILLERS!

Food fantasy, that's what this is.
It actually happened to be born out of one. One fine brunch at Mugg & Beans, we happened to order a tantalizing drink which I, at that time had no idea would make its way to the blog. Honestly, I can't remember the name of that magical sherbet, but this is an oh-so-glorious dupe for a way more affordable price per glass, and because the entire thing looks like marbled layers after layers of juicy, ripe mangoes with sweet, creamy vanilla icecream that look like they're floating atop each other, I named these babies: Mango float chillers!

Dad can't seem to get enough of these, neither does mom. I made these two days in a row just because they were that delicious. Perfect for the blazing summers here.

And then I tossed on some whipped cream and chocolate chips/kiwis and more mango chunks for good measure. Invite family and friends over for a casual outdoor gathering and these will be the star of your party or snuggle up with an individual one to pamper yourself after a sweltering day out.


Delish.

Mango Float Chillers
Serves: 2

Ingredients:

About a cup and a half of chilled mango puree
An equal amount of Vanilla ice cream as the puree.
Whipped cream (to top)
Icing sugar (as preference. I used 1/8th cup)
Corn syrup/Mango syrup (optional)

For the topping:

Mini chocolate chips
Other diced fruits

How-to:

1. Leave out the icecream and mango puree (if you're using the frozen version) to soften until semi-solid.
2. In a blender combine all the mango puree with the required amount of icing sugar, I recommend to add a tad bit lesser sugar than your prefer because the vanilla ice cream adds a lot of sweetness. For an even thicker and candy-er version, add about a tablespoon of corn syrup and keep aside.
3.In another bowl, take out little chunks of the semi-solid vanilla ice cream and churn it with a spoon till it's a thick and creamy liquid.
4. First spoon in the layer of mango puree as the base. Take a spoon and bring up a little of the puree on all the sides. Then spoon in a tablespoon of the vanilla ice cream bringing it a little above and below with the spoon into the puree. Then spoon in the puree again. Gently fold in a little to create the marbled effect between each layer.
5.keep repeating step 4 till the glass is 3/4th full!
6.Top with whipped cream and add mango syrup or fresh fruits. I added mini chocolate chips in one and fruits in the other.

Serve chilled!


Look at all those lovely marbled layers!


And that healthy doze of semi-sweet chips! :)

Florals make everything all the more prettier don't ya think??

Hooked on this?? Why not pin it and share it to let everyone know? 
..............................

Follow me on Pinterest and Facebook or subscribe to get a better deal of DIY goodies and heavenly recipes in store for you!

............................


Stay happy!

Love, Nash
(PS: I'm in the midst of a thunderstorm of exams right now which is why I haven't been uploading regularly, sorry!)


Friday, April 11, 2014

INSPIRATION NATION// DIY ROSES FROM EGG CRATES!

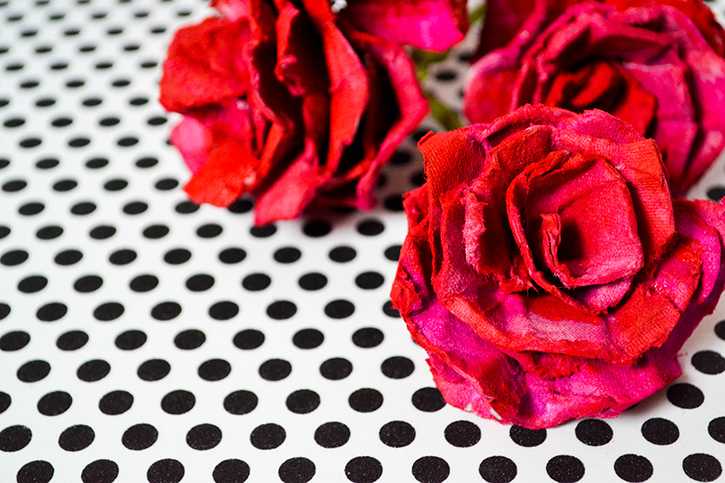
Mommy dear has quite got the hang of my crafty endeavors now which is why she gifted me an empty egg crate last week. I suppose only us craftstresses would see the opportunity there; so I turned this basic kitchen trash into treasure : DIY Roses from egg crates! It was obvious wasn't it? I'm such a rose person, and all of us are looking for new ways to make this Spring pop! Thanks, mum!

The instructions are really basic. Just cut, paint, mold, repeat. Then fashion them into just the sweetest, romantic rose using your favorite super-glue and use them any way you wish. No one's even probably going to guess these beauties were made with egg crates!

You'll need:
-An egg crate, in a light color preferably.
-Acrylic paints in different colors and large-tipped paint brushes
-Newspapers (for easy clean-up)
-Super-glue of your choice

Optional:
-Sturdy wire for steams
-Green ribbon

How-to:
1.Begin by cutting across each row of little cones from the egg tray. Then cut out each row into individual cones. Don't worry I know these will be pointy for now.
  Snip off the pointy end of the cones to make them more curvy. Like rose petals, yeah? Paint them, preferably with a large fluffy paint brush! (I used two different colors, hot pink & bright cherry red to get a more natural effect.) Make sure to get around all the nooks and crevices.

2. For the center of the rose take the smallest half cone (you find them on the extreme left and right of each row of cones) and curl it inwards. Then glue down to secure and make it look like a bud.


3. For the rest of the cones. slit with a scissors as shown in picture across the length of the cone so that you get a longish petal and then mold this to fit around the bud.

4. Keep repeating and adding more 'petals' until you have a rose in full bloom!

5. If you'd like to pop 'em in a vase like me, wrap some green ribbon onto metal wire ( I used the ones from my foam curlers in my DIY Ring Box post). and glue them down to the base of the rose. (Don't forget to hold in place for a few minutes till the glue is dry and the rose sits smug!)

You can use these as gift toppers too or for photography props! Stunning either way!


Liked the idea? Pin  it! (cuz' sharing is hot!)
................

You can also follow me over @ Pinterest/Facebook/Instagram or become a subscriber for regular DIY updates and year-round freebies!

............
And here's the DIY Ring Box I talked about above. The foam curlers have metals inserts in them which I used for the stems of the roses!


Check out the rest of my DIYs in my DIY gallery, you wouldn't know what you may discover. ;)

Lots of hugs,
Nash ( I think you can tell I love a lot of pink & red, lol)


Thursday, April 10, 2014

THE FREEBIE JUBILEE//MODERN REVELATIONS COLLECTION!

I hope you darlings didn't think that the start of my online shop meant the end of my freebie collections. I was just so busy getting my shop up and running and launching a few new products that I had to side track uploading freebies for a while and I'm glad to say I've put together a new freebie for you! :) :)
This is the first time I've introduced something Ikat. (I think I've found my new design crush!) Aaaand lots of gorgeous contrasts, monotones and of course my trademark floral patterns with a twist.

Perfect for the design contemporaries out there looking to add a dash of energy to their projects. Use these for scrapbooking, invites of all kinds, treats, party favors, giftwrapping, screen printing and endless other ways to switch the spark to your creativity!

Please be considerate and note that these printables are strictly for personal use. All printables available in my online shop can be used commercially. If you have any doubts, just drop me a mail!

You can download the entire collection here. (Download instructions if you are a newbie to this: Once the download is done, right click and extract the files from the folder. The files are huge, so I had to compress them for a quick download!)

Last of all, enjoy & don't forget to pin n' share!

Let me know what you think! What would you like to see next?
...................
Subscribe to Craft A Doodle Doo or follow me on Pinterest & Facbook for regular updates of freebies!
..................


(And you can see my other gorgeous digital printables in my freebie gallery!)


Lots of love,
Nash
(Trouble extracting files? Just drop me a comment to let me know and I'll upload the individual images for you!)


FRESH IRRESISTABLE IDEAS...

RIGHT TO YOUR INBOX!

* indicates required

View previous campaigns.