Friday, September 13, 2013

The Decorista Chronicles//Design Your Own Workspace!

Here's today's doze of awesome! DIY Desk Organizers in the newest Design Your Own Series! After the decent popularity of the Wardrobe Stylist Series which features effortlessly lovely, cheap and easy DIY projects that add to your wardrobe glamour, I did a mental note to start up on another series with the same motto!
We have a file box, and a super-cute mini shelf at the bottom that houses my washi tape. You can chuck in notebooks, cute pads and a lot of other stuff; but here's why I went with washi tape!

 Remember my washi tape display stand here? If I didn't clean it regularly, the white plates would periodically collect dust because my cute little stand sat by the window and the Middle East is known for random sand storms!
 ..............................................
Here's what you need!
-White Paper sheets, scissors, craft glue and pencils
-Skewer sticks
-Pretty giftwrap/scrapbook paper
-Sturdy boxes in different sizes*
-Craft Knife
-Metal Ruler (for leveling, measuring and to aid in cutting)

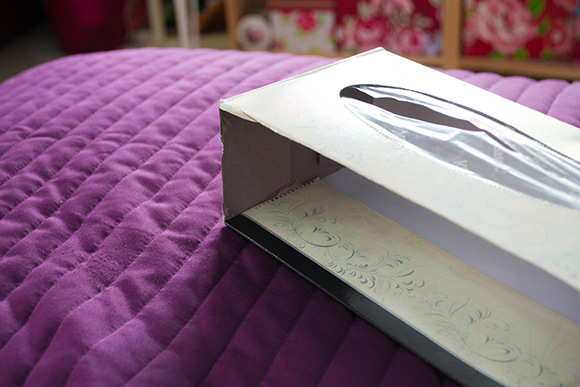
*I used a tissue box at the bottom, however my original plan was to use VHS cassette boxes, ya' know, the transparent ones that used to hold our old-time cassetes? I wanted to layer two of them for all my washi tape, but I couldn't remember where I'd put them when we shifted homes,so I ended up using a tissue box and as you can see it got ever-so-slightly bent.
So I highly recommend you use those transparent/solid VHS tape boxes cuz' they look so much more classier and hold all the more well!
........................................................ 
Steps:
1.Begin by cutting out the flap from one of the longer sides of your box. Cover the ugly cardboard insides with white paper/any paper and glue down the flap to the base.
  2.Measure the height of your box from the side, take the half height and draw a line across, which divides the shorter side of the box in two
3.Insert four-five skewer sticks at equal length intervals and pierce them out through the other sides. You wanna make sure that they just about fit the length of the box and dab glue at the ends just for extra strength.

4.Try on your washi tape arrangement!
(If you are using cassette boxes, then skip step 3!)
And because I was in such hysterics at the time, I simply draped my scarf on top of the box! *sheepish*
4.If you've had any so-not-attractive edges while using the craft knife (like me)on your box, you'll want to make those straight now with the help of scissors.
 .............................................................
5.For the file box, take your sturdy larger box whose base should approximately match the width of the lower box's base (which now holds washi tape)
6.Cut down slant from the top at both the longitudinal sides
7.Wrap it up!
8.Hot glue the file box onto the base box.

9.Go around with a trim of washi tape for added drama!


And to give you guys a teaser, the next post in the series will feature "Design Your Own: Stationery!". Design Your Own aims to give you a fantastic office space without having to spend a dime! College students and dorm room'ers, this is your cue!
So, in the next thriller here at Craft A Doodle Doo, I show you how you can make your own journals and note books (like the one I handcrafted above) with a watercolor flair that looks store-bought!

Make sure you don't miss out on the next post!
 ............................................................
Join me on Pinterest and Facebook or become a subscriber to make sure you receive your next pill of epic craft action!
............................................................

You can check out the tut for the cute trinkets jars above here!
To see how to make your own washi tape, hop here!
*********************
Pin this post now if you've found it handy and spread the word!
Oodles of love n' hugs;
Nash


Saturday, September 7, 2013

Craving Ravings//Korean Fried Chicken!!

How many of you are die-hard fans of juicy, succulent chicken whisked in spicy-sweet sauce?Korean fried chicken fans to be more precise! I cooked this beauty today as a family lunch and it was lip-smacking!
This bomber is really simple to prepare and can be served either as an appetizer or a side dish.
Here are the ingredients!
-Chicken (boneless or bone-in)
I used 500g boneless chicken breasts and cut them up in chunks.If you're using bone-in, then this recipe stands good for 5-6 pieces.
-Salt to taste
-1 tsp. ground black pepper
-3 tbsp corn starch powder
-3 tbsp all purpose flour
-2 tbsp rice flour
-1 egg, beaten
-1 tbsp ginger garlic paste
-2 tbsp ketchup
-2 tsp hot sauce
-2 tsp soya sauce
-1 tsp/1.5 tsp brown sugar
-2 tsp. vinegar
-1 tbsp sesame seeds

Method:
1.Mix the salt, pepper, cornstarch,rice flour and all purpose flour in a bowl and the egg wash in another bowl.Coat the chicken pieces in flour,then in the egg wash and in the flour again for a crunchy exterior. Then set aside.

2.Meanwhile, heat the oil in a wok for frying. To test if the oil is ready to fry in, dip a part of the batter in the wok and if the oil sizzles, you're good to go!

3.Fry the chicken in small batches to avoid crowding the pan until golden brown (time depends on the size of chicken chunks) and place on a tissue paper to absorb excess oil.

4.To make the sauce, add the sauces, sugar,salt, ginger garlic paste and vinegar together and mix it with the help of a spatula to form a smooth paste. 

5.Let the sauce simmer on a very low flame for about 5-7 minutes.

6.Add the chicken that you'd kept aside into the sauce and let the rich, tangy sauce coat the chicken well.

7.Roast the sesame seeds separately and use them as a garnish on your hot, tantalizing chicken.
Serve hot!
This is the easier version of the classic Korean fried chicken which uses Korean chilli paste and other local taste enhancers, so if you have trouble finding those, make this and you won't be missing out on anything!
The crunchy chicken coating tossed in the firey sauce with a hint of sweetness is an absolute delight to indulge in!
And the humble impact of the sesame seeds is scrumptious!
*faints*
............................................................................
Make sure you pin this fantastic recipe and have your taste buds relish its absolute  lusciousness!
.............................................................................
Join me at Craft A Doodle Doo via Pinterest and Facebook to find lots more heavenly recipes, DIY projects and ravishing freebies!

Take care,
Nash
-


Friday, September 6, 2013

Craving Ravings//Creamy Chicken Pasta!

Creamy Chicken Pasta anyone? =) When my sweet cousin sister sent me this recipe to try saying that people who dislike pasta in her family happened to smack this up, I knew I had to whip this one pronto!
You know how I said earlier that I post eateries on my blog only when they come out 'that' good?Well this one's a winner!
It's rich, super-creamy with tender pieces of chicken tossed in, enveloped in the delectable sauce and you're gonna savor it to the last bite!Keep in mind that this dish is calorific so save it for special pampering moments!

FRESH IRRESISTABLE IDEAS...

RIGHT TO YOUR INBOX!

* indicates required

View previous campaigns.